
Orchid Care: A Complete Guide
How to Repot an Orchid: A Step-by-Step Guide for Healthy Plants
If you want to keep your orchid healthy, thriving, and blooming beautifully, learning how to repot an orchid is an essential part of orchid care. While orchids may seem delicate, repotting them is actually a simple process once you understand what the plant needs.
How Much Light Do Orchids Need? A Complete Guide to Orchid Lighting
Explore everything you need to know about orchid lighting, including how much light orchids need, the best window locations, how to recognize signs of too much or too little light, and when artificial lighting can help support healthy growth and blooming.


How to Water Your Orchid (And How Often): 5 Simple Steps for Healthy Blooms
Learn how to water an orchid the right way with Westerlay Orchids. Discover how often to water, the best watering method for Phalaenopsis and other orchid types, and expert tips to keep your blooms thriving.

How to Get Orchids to Rebloom
Learn how to get your Phalaenopsis orchid to rebloom with expert tips on light, temperature, watering, trimming, and encouraging new flower spikes.

How to Fertilize Orchids
Not sure how to fertilize your orchid? Our expert guide covers the best fertilizer, how often to feed, and simple tips for stronger growth and long-lasting blooms.


Orchid Care: The Complete Guide
Orchids are among nature’s most elegant and rewarding plants, and caring for them is simpler than you might think. At Westerlay Orchids, we’ve spent decades growing millions of orchids with care and precision — and we’re here to share everything you need to know to help yours thrive.
Whether you’re nurturing your first orchid or expanding your collection, this guide covers the essentials of watering, lighting, temperature, repotting, and long-term maintenance.
Understanding Your Orchid
Orchids are one of the most diverse plant families on Earth, with over 25,000 known species and thousands of hybrids cultivated by growers around the world. Among them, the Phalaenopsis orchid — often called the moth orchid — is the most popular for home growing, and for good reason. These elegant orchids are known for their graceful stems, long-lasting blooms, and their ability to rebloom year after year with proper care.
At Westerlay Orchids, we specialize in cultivating Phalaenopsis orchids because they thrive in indoor environments, adapt beautifully to home conditions, and offer months of color and beauty with minimal maintenance.
Understanding how your orchid is built — and what each part does — is the key to keeping it healthy and happy.
Anatomy of a Phalaenopsis Orchid
Understanding how your orchid grows helps you know what it needs. Every part of the plant has a role to play:
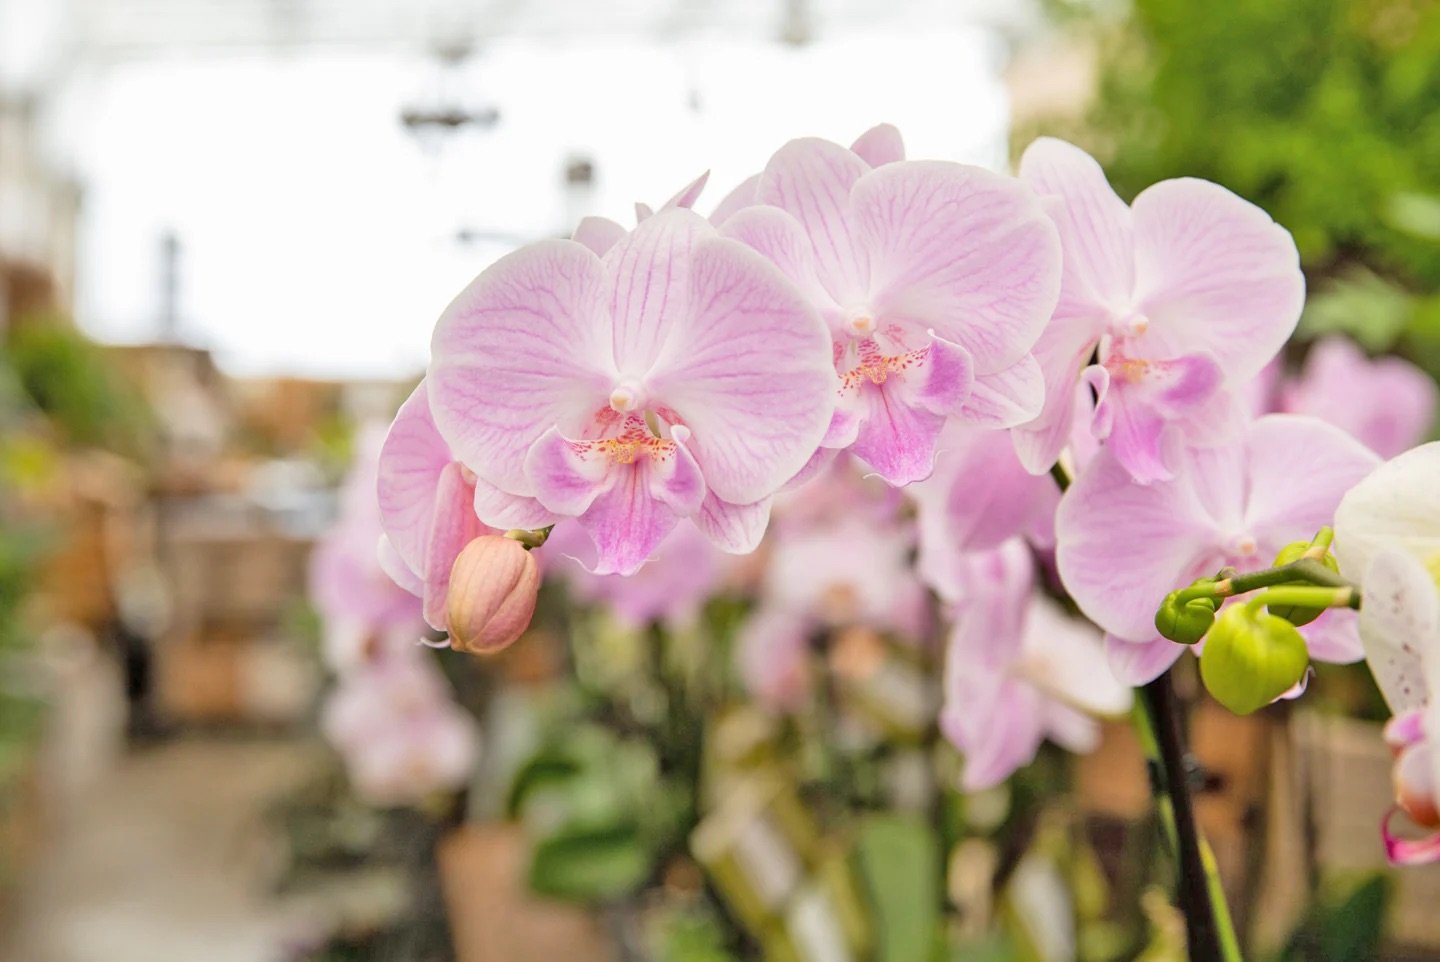
Blooms:
The flowers are the orchid’s showpiece — elegant, long-lasting, and vibrant. Each bloom can last several weeks, and a single spike may produce multiple flowers that open one after another.
Buds:
Buds form along the flower spike before blooming. If buds drop before opening (known as “bud blast”), it’s often due to sudden environmental changes such as temperature fluctuations, drafts, or inconsistent watering.

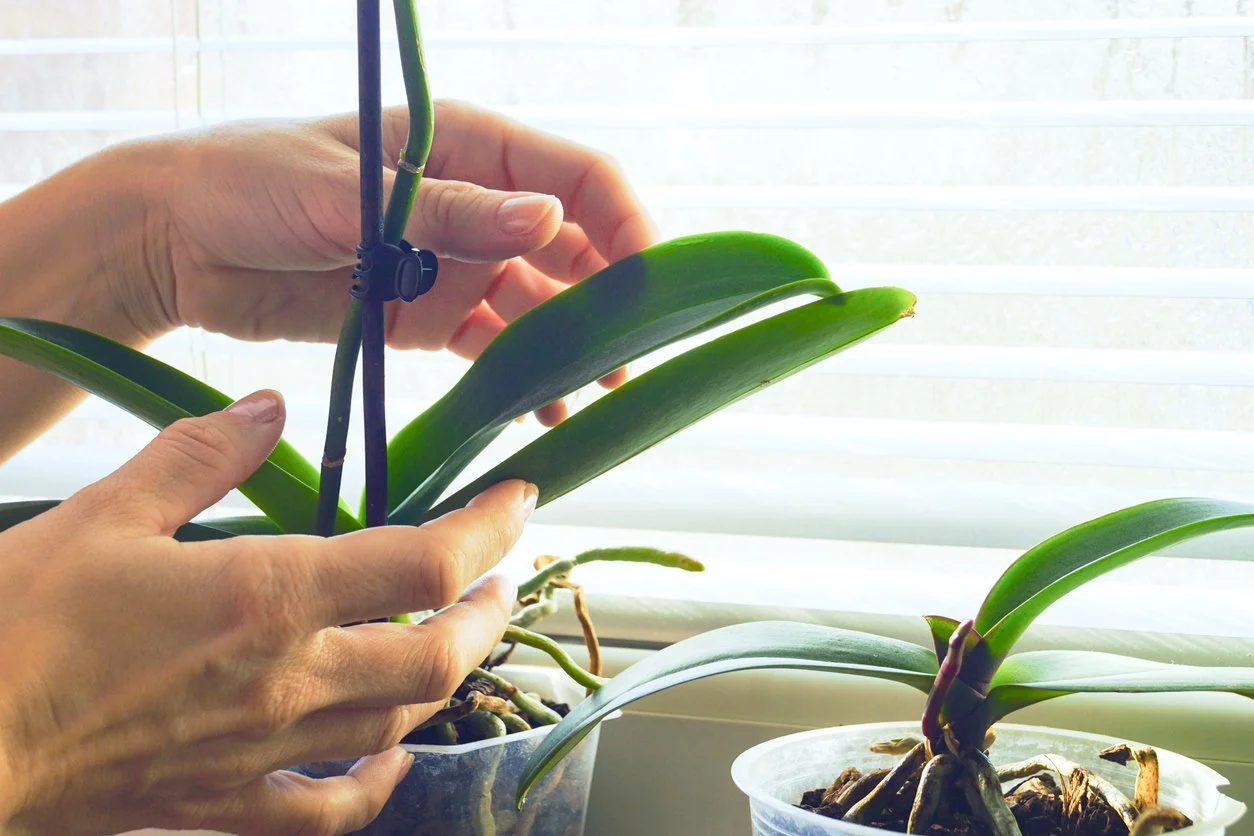
Stems (Flower Spikes):
The stem, or flower spike, emerges from the base of the leaves and supports the buds and blooms. After flowering, spikes may rebloom from nodes or be trimmed to encourage new growth.
Nodes:
Nodes are small bumps along the flower spike. Each node has the potential to produce new buds, branches, or even a small plantlet (called a keiki). When trimming after bloom, cutting just above a node can sometimes prompt a new flower branch.
Leaves:
The broad, fleshy leaves store energy and moisture. Healthy leaves should be firm and evenly green. Yellowing, wrinkling, or soft leaves can indicate problems with watering, light, or temperature.
Roots:
Orchid roots are thick and covered in a spongy tissue called velamen, which absorbs moisture and nutrients from air and water. Healthy roots are green when hydrated and silvery when dry. Many roots grow outside the pot — this is perfectly natural and a sign of a thriving plant.
Bark (Substrate):
Unlike most houseplants, orchids don’t grow in soil. They prefer a coarse, well-draining substrate such as bark, moss, or a specialized orchid mix. The bark allows for airflow around the roots and prevents root rot.
Grow Pot:
The clear plastic pot commonly used for orchids is designed to promote light exposure and air circulation for the roots. The transparency helps you easily monitor root health and moisture levels. Many growers place the grow pot inside a decorative outer container for display while maintaining proper drainage.
Westerlay Insight
In their native tropical habitats, orchids grow high in tree canopies — clinging to bark and absorbing moisture from rain and humidity. By understanding this natural growing environment, you can better recreate those conditions at home: bright, indirect light, open airflow, and consistent moisture without letting the roots sit in water.
Orchid Lighting: Bright, Indirect, and Gentle
Light is one of the most important factors in keeping your orchid healthy and encouraging it to rebloom. Orchids are tropical plants that grow beneath the canopy of trees, where sunlight filters softly through the leaves. To replicate those natural conditions indoors, your goal is to provide bright, indirect light — enough to support photosynthesis, but never harsh or direct sunlight that can burn delicate leaves.
Finding the Right Location
The best spot for most orchids is near an east- or west-facing window, where they’ll receive plenty of light without the intense midday heat.
East-facing windows are ideal, offering gentle morning sun.
West-facing windows work well too, especially if you filter the light with a sheer curtain.
South-facing windows can provide good light if the sun is diffused, but direct midday rays may cause leaf burn.
North-facing windows may be too dim for consistent blooming unless supplemented with artificial light.
If natural light is limited, you can easily support your orchid with a grow light. Full-spectrum LED grow lights designed for indoor plants provide the right balance of intensity and color temperature to mimic natural daylight.
How to Read the Leaves
Your orchid’s leaves will tell you whether it’s getting the right amount of light:
Medium green: Just right — your orchid is happy.
Dark green: Too little light — your plant may not bloom.
Yellow-green or reddish tint: Too much light — move it slightly farther from the window or add a sheer curtain.
Regularly rotate your orchid every few weeks so all sides receive equal light, promoting balanced growth and preventing the plant from leaning toward one direction.
Light and Blooming Cycles
Orchids need a balance of light and temperature to trigger new flower spikes. A few weeks of slightly cooler nights (around 60°F) combined with steady bright light during the day can signal to the plant that it’s time to bloom again. This natural rhythm mimics the seasonal change orchids experience in their native tropical habitats.
Westerlay Tip: Keep It Consistent
Consistency matters more than intensity. Rather than exposing your orchid to bursts of direct sunlight or sporadic darkness, aim for a steady light source each day. If you use artificial lights, set them on a 12–14 hour timer to keep your orchid’s natural rhythm intact.

Watering Orchids the Right Way
LEARN MORE: HOW TO WATER YOUR ORCHID
Watering is the single most important — and often the most misunderstood — aspect of orchid care. While orchids are tropical plants, they are not heavy drinkers. Their roots need both moisture and airflow, which means they should be watered thoroughly but allowed to dry slightly between waterings.
At Westerlay Orchids, we often say: “When in doubt, wait a day.” Orchids prefer a little too dry rather than too wet. Overwatering is the most common cause of root rot and plant decline, while consistent, mindful watering leads to healthy roots, firm leaves, and long-lasting blooms.
How Often to Water Orchids
In most indoor environments, watering once a week is a good rule of thumb. However, your orchid’s actual needs depend on factors such as temperature, humidity, pot type, and light exposure.
In warm, dry rooms, you may need to water every 4–5 days.
In cooler or more humid environments, every 10–12 days may be sufficient.
Always check the roots before watering — silvery white means it’s time, green means it’s still hydrated.
A clear plastic grow pot makes it easy to see root color and moisture levels, helping you water with confidence.

How to Water Your Orchid
LEARN MORE: HOW TO WATER YOUR ORCHID
Remove any decorative outer pot so the grow pot can drain freely.
Place the grow pot under a gentle stream of room-temperature water (or use a watering can).
Water evenly over the bark mix until the pot feels heavy and water runs from the drainage holes.
Let it drain completely before returning the orchid to its decorative container. Never let the pot sit in standing water.
This process mimics tropical rain showers, saturating the roots without drowning them.
If your orchid’s potting mix dries very quickly, you can lightly mist the bark between waterings — just avoid getting water in the crown (the center of the leaves), as trapped moisture there can lead to crown rot.
Water Quality Matters
Orchids are sensitive to water quality. Whenever possible, use room-temperature filtered, rain, or distilled water. Hard tap water can leave mineral deposits on the bark and roots over time. If tap water is your only option, let it sit out overnight before watering to allow chlorine to dissipate.
The “Soak and Drain” Method
For busy plant owners, the “soak and drain” method is a simple and effective approach:
Place your orchid (in its grow pot) into a bowl or sink filled with about two inches of water.
Let it soak for 10–15 minutes.
Lift it out and allow all excess water to drain away before returning it to its container.
This ensures the roots and bark are evenly moistened without the risk of overwatering.
Westerlay Tip: Trust the Roots
Your orchid’s roots are its best communication system. Healthy roots are firm, plump, and light green after watering. Soft, brown, or mushy roots signal too much moisture and poor drainage.
If you notice your orchid’s roots staying dark and wet for several days, reduce your watering frequency or check that your potting medium is not breaking down.
Ideal Orchid Temperature, Humidity, and Airflow
To keep your orchid thriving, it helps to think about where these plants come from. In their native tropical habitats, orchids grow high in the branches of trees, where temperatures are mild, air moves freely, and humidity is consistently high. Recreating those gentle, balanced conditions indoors is the key to keeping your orchid healthy and blooming year after year.
Temperature: Comfortable and Consistent
Phalaenopsis orchids enjoy the same temperatures that people find comfortable:
Daytime: 70–80°F (21–27°C)
Nighttime: 60–70°F (16–21°C)
They can tolerate short periods outside this range, but large fluctuations or drafts can cause stress, leading to bud drop or slowed growth. Avoid placing your orchid near heating or cooling vents, radiators, or drafty windows.
A slight drop in nighttime temperature can actually encourage new flower spikes to form. Many growers use this natural cue — cooler nights in the fall — to trigger the next blooming cycle.
Humidity: Keeping It in the Sweet Spot
Orchids prefer moderate to high humidity, ideally between 40–70%. In homes with dry air, especially during winter when heating systems are running, humidity often drops too low for orchids to thrive.
Here are a few easy ways to increase humidity around your plant:
Use a humidifier: A small tabletop model keeps moisture levels steady.
Create a pebble tray: Fill a shallow tray with pebbles and water, and set your orchid pot on top (not in the water). As the water evaporates, it creates a gentle humid microclimate.
Group plants together: Several plants clustered nearby naturally raise humidity levels.
Avoid over-misting the plant itself — while occasional light misting is fine, water that sits on leaves or in the crown can lead to fungal problems or crown rot.
Airflow: Fresh but Gentle
Orchids love fresh air. In nature, breezes help dry roots after rain and prevent fungal issues. Indoors, good air circulation keeps the environment healthy and balanced.
A few ways to promote airflow:
Place orchids in a well-ventilated area with indirect air movement.
Use a small fan on a low setting in the room, pointed away from the plant.
Open windows occasionally to refresh the air, as long as the temperature is within range.
Airflow and humidity work hand-in-hand — together, they create a healthy environment that mimics the orchid’s natural habitat.
Westerlay Tip: Balance Is Everything
Temperature, humidity, and airflow form the foundation of a thriving orchid environment. Too hot or too cold, too dry or too still — any extreme can cause stress. But when these three elements are balanced, orchids grow strong, resist disease, and reward you with beautiful, lasting blooms.
Orchid Fertilizing: Feeding and Fertilizing Your Orchid
LEARN MORE: HOW TO FERTILIZE YOUR ORCHIDS
All living things, orchids need nutrients to grow strong and produce blooms. In nature, orchids receive trace amounts of nutrition from rainwater that’s rich in organic matter. Indoors, however, they rely on you to supply the right balance of nutrients.
Fertilizing your orchid properly supports leaf growth, healthy roots, and long-lasting flowers, while helping the plant recover after each blooming cycle. The key is moderation: orchids need small, consistent doses of fertilizer — not heavy feeding all at once.
Choosing the Right Fertilizer
Look for a balanced, water-soluble orchid fertilizer with equal proportions of nitrogen (N), phosphorus (P), and potassium (K), often labeled as 20-20-20 or 10-10-10. These numbers represent the essential nutrients your orchid needs:
Nitrogen (N): Encourages healthy leaf and root growth.
Phosphorus (P): Supports flower production and strong stems.
Potassium (K): Boosts overall plant health and resilience.
Many orchid fertilizers also include trace elements such as calcium, magnesium, and iron, which further support growth and coloration.
If you prefer a lower-maintenance option, consider a slow-release orchid fertilizer — these come in pellet or stick form and gradually feed the plant over time.
How Often to Feed
During the active growing season — typically spring through early fall — orchids benefit from regular, light feeding:
Every 2–3 weeks using a water-soluble fertilizer at half the recommended strength.
When growth slows in cooler months (late fall and winter), reduce feeding to once a month or even pause until new growth appears in spring.
The most common mistake is overfertilizing, which can damage roots and leave white mineral buildup on the bark. Remember: a little, more often, is better than a lot all at once.
How to Fertilize
Water your orchid first. Moist roots absorb nutrients more evenly and are less likely to burn.
Mix fertilizer at half strength. Follow the label directions but dilute to 50%.
Pour gently through the bark mix until water drains from the bottom.
Rinse occasionally. Every few months, flush the pot thoroughly with plain water to wash away any fertilizer residue.
This simple routine nourishes your orchid while keeping the root system clean and active.
Special Feeding Tips
After repotting: Wait about two weeks before resuming fertilizer to let roots settle.
For reblooming: A fertilizer slightly higher in phosphorus (the middle number) can encourage flower spike formation.
For water-sensitive orchids: Use rainwater or distilled water for mixing fertilizer, as it prevents salt buildup from tap water.
Westerlay Tip: Observe and Adjust
Healthy orchids show their satisfaction through steady leaf growth, firm roots, and a consistent cycle of blooms. If your orchid’s leaves appear dull or its growth slows, it may benefit from slightly more frequent feeding. If you notice white crusts on the bark or roots, it’s time to flush the pot and lighten your fertilizer mix.
With careful observation and a gentle feeding schedule, your orchid will reward you with strong growth and beautiful, enduring blooms.
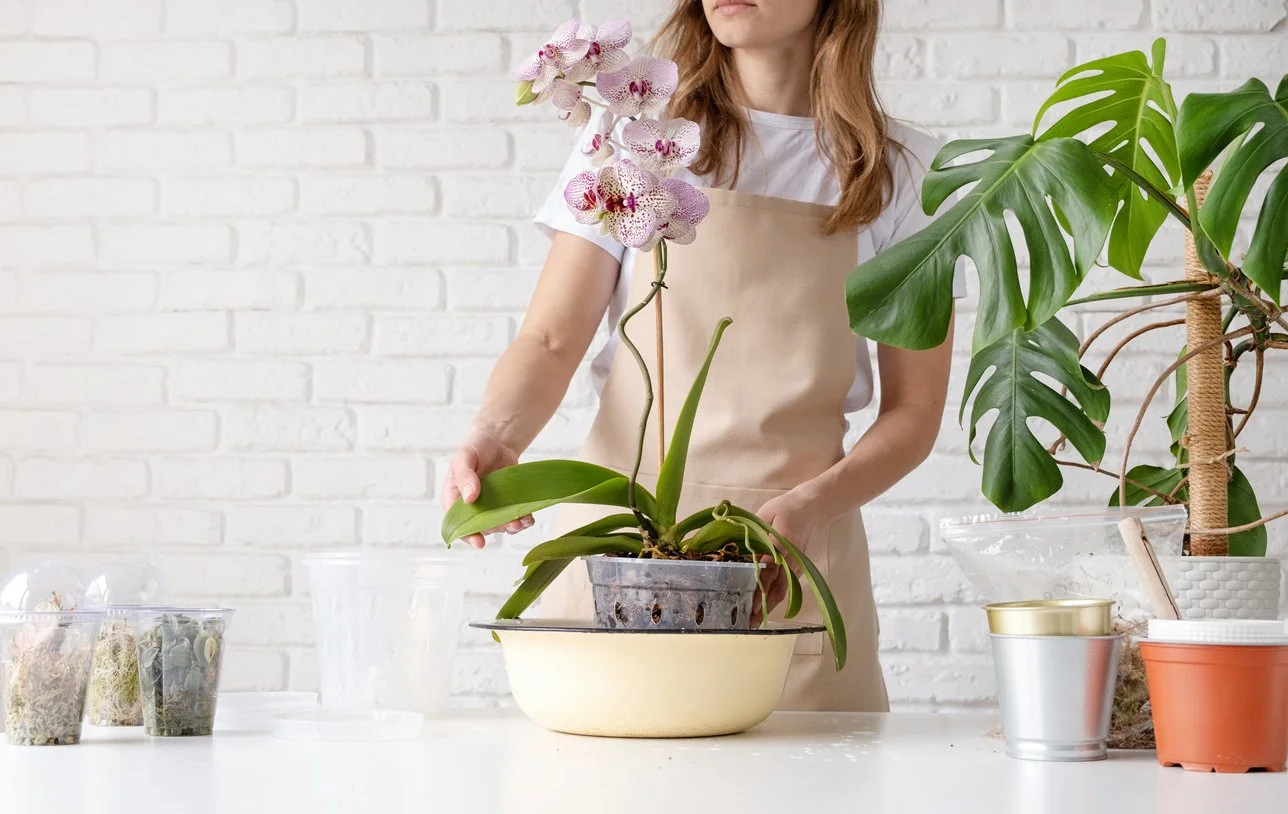
Repotting Orchids for Long-Term Health
Repotting is one of the best things you can do to keep your orchid healthy over time. While it may sound daunting, it’s actually a simple and rewarding process that gives your orchid room to grow and ensures its roots have the airflow and drainage they need.
Unlike most houseplants, orchids don’t grow in soil. Their roots need plenty of air circulation and a well-draining substrate, such as bark or sphagnum moss. Over time, this organic material naturally breaks down, compacting around the roots and reducing airflow — which can lead to rot and nutrient issues. Repotting refreshes the growing medium and keeps your orchid thriving.
When to Repot
Most orchids benefit from repotting every 1–2 years, depending on growing conditions and the type of bark mix used. Signs it’s time to repot include:
The bark or moss looks soft, dark, or breaks apart easily.
Roots are growing densely out of the pot or circling inside it.
Water no longer drains freely through the pot.
The plant looks healthy but hasn’t bloomed in a while.
The ideal time to repot is just after your orchid finishes blooming, when it enters a period of new root and leaf growth. Avoid repotting when the plant is in full bloom — it’s best to wait until flowers fade naturally.
What You’ll Need
Fresh orchid bark mix (or a blend of bark, perlite, and moss).
A clean grow pot with drainage holes (choose one slightly larger than the old pot).
Sterile scissors or pruning shears.
Optional: a decorative outer pot for display.
How to Repot Your Orchid
Gently remove the orchid from its old pot, taking care not to damage the roots.
Shake off and discard the old bark mix. Rinse the roots lightly to remove debris.
Trim any soft, brown, or mushy roots — these are no longer healthy.
Position the orchid in the new pot. The base of the lowest leaves should sit just above the surface of the bark.
Fill in around the roots with fresh orchid bark mix, gently tapping the pot so the bark settles evenly.
Water lightly and allow the plant to drain thoroughly.
Repotting can temporarily slow blooming, but it’s essential for the orchid’s long-term vitality. Within a few weeks, new roots will begin to grow and anchor into the fresh bark.
Aftercare and Adjustment
Following repotting, place your orchid in bright, indirect light and maintain regular watering. Wait about two weeks before resuming fertilizer to allow roots to recover. A newly repotted orchid might appear a bit subdued at first, but this is normal — once it acclimates, you’ll see stronger leaves and vigorous new roots.
Westerlay Tip: Clear Pots Make It Easy
Westerlay recommends using clear grow pots for orchids whenever possible. They allow light to reach the roots (which naturally photosynthesize) and make it easy to monitor both moisture levels and root health at a glance. For decorative display, simply place the clear pot inside a stylish outer container with good drainage.
Helping Your Orchid Rebloom
One of the most rewarding parts of orchid care is encouraging your plant to bloom again. A single Phalaenopsis orchid can rebloom year after year, producing elegant flower spikes that last for months — but it needs a little rest and the right environmental cues to do so.
At Westerlay Orchids, we want you to think of your orchid as a living rhythm: bloom, rest, and renewal. Once you understand that cycle, reblooming becomes second nature.
After the Blooms Fade
When your orchid’s flowers have finished blooming, resist the urge to throw it away — the plant is far from done. The next steps depend on your goals and the condition of the flower spike:
If the spike is still green and healthy:
Cut it back to just above a node (one of the small bumps below a faded flower). This can encourage a new side spike to grow from that point, producing more blooms in a few months.If the spike has turned brown or dry:
Cut it all the way back to the base of the plant. This allows your orchid to rest and redirect energy toward root and leaf growth.
Use sterilized scissors or shears to prevent infection, and avoid cutting into the leaves or crown.
Encouraging New Flower Spikes
Reblooming usually begins with the emergence of a new spike from the base of the plant — often in late fall or winter. You can help trigger this process with a few simple adjustments:
Provide consistent, bright, indirect light.
Orchids need steady light to build the energy required for blooming.Create a gentle temperature drop.
A difference of about 10°F between day and night (for example, 75°F during the day and 65°F at night) can signal the plant that it’s time to form a new spike.Continue light fertilizing.
A balanced fertilizer or one slightly higher in phosphorus helps encourage bloom formation.Be patient.
From the first sign of a spike to open flowers can take 8–12 weeks. Avoid moving the plant or changing its environment too drastically during this period.
Caring for Your Orchid During Its Rest Phase
Between blooms, your orchid shifts its energy toward rebuilding roots and leaves. This is a crucial recovery stage that sets the foundation for the next bloom cycle.
During this time:
Maintain regular watering and bright, indirect light.
Fertilize every 3–4 weeks with a diluted orchid fertilizer.
Avoid overwatering or overfeeding, as growth naturally slows.
Once new leaves and roots appear, you’ll know your orchid is gaining strength for its next bloom.
When to Expect Reblooming
Most Phalaenopsis orchids bloom once or twice a year, depending on conditions. Each plant has its own rhythm, influenced by light, temperature, and care. Many home growers find that after a period of rest in late summer or fall, a new flower spike emerges and blooms beautifully through the winter months.
Westerlay Tip: Patience Pays Off
Reblooming can take time — sometimes several months — but it’s one of the most satisfying parts of orchid care. Each new flower spike is proof that your care routine is working and that your orchid is thriving in your environment.
At Westerlay, we see this cycle every day in our greenhouses, and we know that with consistency and a little patience, any healthy orchid can rebloom again and again.
Common Orchid Problems and Solutions
Even the healthiest orchids occasionally show signs of stress. The good news is that most issues are easy to correct once you know what your plant is trying to tell you. Because orchids communicate through their leaves, roots, and blooms, careful observation is the best diagnostic tool you have.
At Westerlay Orchids, we believe that every challenge is an opportunity to better understand your plant. The following guide covers the most common orchid care issues — and how to fix them before they become serious.
Wrinkled or Limp Leaves
Cause: Underwatering, low humidity, or damaged roots.
Solution: Check the roots first. If they’re white and dry, it’s time to water. Ensure the potting medium isn’t decomposed and that the roots have access to both moisture and air. Increasing humidity (to around 50–60%) will also help restore firmness to the leaves.
If roots appear brown or mushy, the problem may actually be overwatering. In that case, trim the affected roots and repot in fresh bark.
Yellowing Leaves
Cause: Too much light, overwatering, or natural aging.
Solution: A few yellow leaves at the bottom of the plant are perfectly normal — orchids shed older leaves as new ones grow. However, if multiple leaves are yellowing at once, move the plant out of direct sunlight and check your watering schedule. Let the bark dry slightly between waterings to prevent further stress.
Brown Leaf Tips or Spots
Cause: Salt buildup from fertilizer or poor water quality.
Solution: Flush the potting medium thoroughly with clean water to remove excess salts. Consider switching to distilled, rain, or filtered water, and reduce fertilizer strength by half for future feedings.
Root Rot
Cause: Overwatering or compacted potting medium.
Solution: Remove the orchid from its pot, trim away all brown or mushy roots, and repot using fresh, well-draining orchid bark. Water sparingly for the first week after repotting to allow the roots to recover.
Healthy roots should be firm and light green after watering — use that as your guide moving forward.
Bud Blast (Buds Drying or Falling Off)
Cause: Sudden environmental changes, such as temperature drops, drafts, or low humidity.
Solution: Keep your orchid in a stable environment away from vents, heaters, or cold windows. Maintain consistent humidity and avoid moving the plant while buds are forming. Once the environment stabilizes, new buds should develop normally.
No Blooms or Flower Spikes
Cause: Insufficient light or lack of temperature variation.
Solution: Move your orchid to a brighter location with indirect sunlight. To stimulate blooming, expose the plant to slightly cooler nights — around 60–65°F — for a few weeks. Continue light fertilizing and be patient; orchids often take several months to rebloom after their rest period.
Sticky Residue or Pests
Cause: Common orchid pests like aphids, mealybugs, or scale.
Solution: Wipe leaves gently with a damp cloth and a mild solution of water and insecticidal soap. Repeat weekly until the pests are gone. Maintaining good airflow and avoiding excess moisture on leaves helps prevent infestations.
Westerlay Tip: Prevention Is the Best Care
Most orchid problems are the result of environmental stress — too much or too little water, light, or humidity. By keeping a consistent care routine and checking your orchid weekly, you’ll catch small issues before they escalate. Healthy orchids are resilient, and with attentive care, they’ll reward you with years of beautiful growth and blooms.
Westerlay Orchids: Sustainability and Quality You Can Trust
At Westerlay Orchids, we believe that the beauty of a single orchid bloom carries a responsibility — to the environment, to our community, and to the generations who will enjoy these plants after us. That’s why sustainability isn’t just a part of what we do; it’s the foundation of how we grow.
Every orchid that leaves our greenhouses in Carpinteria, California, represents years of refinement, care, and a deep respect for nature. From water conservation to energy efficiency, our growing process is designed to minimize waste, reduce impact, and produce orchids of exceptional quality.
Sustainably Grown in California
Westerlay is proud to grow all of our orchids locally along California’s Central Coast, where cool ocean breezes and natural light create an ideal environment for cultivation. By growing close to home, we reduce transportation emissions and ensure every orchid arrives fresh and strong.
Our team continually innovates with sustainable growing methods — from precise climate control systems that reduce energy use, to advanced irrigation technologies that conserve thousands of gallons of water each year.
Water Conservation and Recycling
Water is one of California’s most precious resources, and at Westerlay, we take stewardship seriously. We’ve implemented a closed-loop water recycling system that captures, filters, and reuses irrigation water throughout our greenhouses. This system reduces overall water use by up to 50% while maintaining the purity orchids require to thrive.
By monitoring pH and nutrient levels in real time, we ensure that every drop is used efficiently and responsibly — keeping both our orchids and our environment healthy.
Eco-Friendly Growing Practices
In addition to water recycling, Westerlay is committed to using environmentally friendly growing media and natural pest management practices. Whenever possible, we source renewable materials and avoid harsh chemicals, relying instead on biological controls and beneficial insects to maintain plant health.
Our packaging is designed with recyclability in mind, helping customers reduce waste at home. These efforts reflect our goal to leave a lighter footprint without compromising the beauty or quality of our orchids.
Community and Craftsmanship
Sustainability also means investing in people. The Westerlay team — from horticulturists to logistics experts — shares a deep passion for plants and a genuine respect for each other. We provide ongoing training, fair wages, and a workplace built on care and collaboration.
That culture of respect extends beyond our greenhouses. Westerlay regularly supports local organizations, schools, and nonprofits throughout Santa Barbara County, contributing to the same community that has supported our growth for decades.
Westerlay Quality Promise
Each Westerlay orchid is carefully inspected before it leaves our facility, ensuring it meets our standards for strength, longevity, and beauty. We take pride in producing orchids that not only brighten homes and businesses but also represent responsible, sustainable growing practices.
When you purchase a Westerlay orchid, you’re not just bringing home a beautiful plant — you’re supporting a company that grows with integrity, stewardship, and heart.

Shop Westerlay Orchids
Caring for orchids becomes even more rewarding when you start with a plant that’s been grown with care, integrity, and expertise. At Westerlay Orchids, every bloom is the result of decades of craftsmanship and a deep respect for nature.
Our orchids are grown in sustainable greenhouses along California’s Central Coast, where ideal light and temperature conditions allow each plant to flourish naturally. Every orchid is hand-selected and quality-checked before it leaves our facility, ensuring it arrives at your home or business strong, healthy, and ready to thrive.
Whether you’re new to orchids or expanding your collection, you’ll find a wide range of elegant, long-lasting plants to suit any space or occasion — from minimalist single-stem Phalaenopsis orchids to lush, premium multi-stem arrangements.
For Professionals and Events
Westerlay also supplies fresh, premium orchids in bulk for floral professionals, designers, and event planners. Our Box of Orchids program offers curated boxes of stunning, high-quality orchids shipped directly from our greenhouses to your door.
Perfect for:
Weddings and celebrations
Corporate events and hotel décor
Florists, stylists, and retail displays
Each box is packed with care to ensure your orchids arrive fresh, vibrant, and ready for design work or display.
Explore BoxofOrchids.com to learn more or place an order for your next project.
Where to Find Westerlay Orchids
You can find Westerlay Orchids online or at many fine retailers throughout the western United States. Each orchid you purchase helps support sustainable growing practices and local jobs in our California community.
Visit Westerlay.com to browse our current collections, learn more about our growing process, or discover detailed care guides for every stage of your orchid’s life.
In Summary
Orchid care is simpler than it seems. With the right balance of light, water, and attention, your orchid can continue to bloom beautifully for years to come.
At Westerlay Orchids, we’ve spent generations perfecting the art of growing exceptional orchids — and we’re honored to share that knowledge with you. From our sustainable greenhouses to your home, each orchid represents our commitment to quality, craftsmanship, and the joy of living with nature.
Explore. Learn. Grow. And let your orchids thrive with confidence.
Frequently Asked Questions About Orchid Care
How often should I water my orchid?
Most orchids should be watered about once a week. However, temperature, humidity, and light all affect how quickly your plant dries out. Check the roots: when they look silvery white, it’s time to water; when they’re green, they’re still hydrated.
Should I use ice cubes to water my orchid?
We don’t recommend watering orchids with ice cubes. Orchids are tropical plants, and cold water can shock their roots. It’s best to use room-temperature water and to water thoroughly, allowing the pot to drain completely.
How much water does my orchid need?
Water enough to saturate the bark mix so that moisture reaches all roots, but never let the pot sit in standing water. Typically, about one-quarter to one-half cup of water per week is sufficient for a standard-size orchid in a 4–5 inch pot, depending on conditions.
What’s the best time of day to water orchids?
Morning is ideal. Watering early in the day gives roots time to absorb moisture and ensures that any excess water on the leaves or crown dries before nightfall, reducing the risk of rot.
Should I water my orchid from the top or soak the roots?
Either method works — the key is thorough watering and proper drainage. You can pour water evenly through the bark from above, or soak the pot in a bowl of water for 10–15 minutes and then drain completely. Both approaches mimic natural tropical rain and are equally effective.
Do orchids like humidity, and how can I provide it?
Yes. Orchids thrive in 40–70% humidity. You can increase humidity by placing your orchid on a pebble tray with water, grouping plants together, or using a small humidifier. Avoid misting the leaves directly, as water can collect in the crown and cause rot.
How do I know if I am overwatering my orchid?
Signs of overwatering include soft, yellowing leaves, mushy roots, and persistent damp bark. Healthy roots should be firm and light green after watering, not dark or slimy. If you suspect overwatering, let the plant dry out and repot with fresh bark if needed.
Can tap water harm my orchid?
It depends on your local water quality. Hard or heavily chlorinated water can cause salt buildup that damages roots. If possible, use filtered, distilled, or rainwater. If you use tap water, let it sit out overnight before watering to allow chlorine to dissipate.
Do orchids need less water in winter?
Yes. During winter, orchids grow more slowly and use less water. The bark mix will also dry out more slowly in cooler air. Always check root color and texture before watering — if they’re still green or the bark feels damp, wait a few more days.
How do I water an orchid in a decorative pot without drainage holes?
If your decorative pot doesn’t have drainage holes, keep your orchid in a clear plastic grow pot inside it. When watering, remove the inner pot, water and drain thoroughly, then place it back in the decorative container. Never water directly into a sealed pot — trapped water leads to root rot.
Do orchids need direct sunlight?
No. Orchids prefer bright, indirect light. Too much direct sun can scorch their leaves, while too little light can prevent blooming. An east- or west-facing window with filtered light is usually perfect.
How can I get my orchid to rebloom?
After blooming, give your orchid a brief rest period with bright light, moderate watering, and slightly cooler nights. Trimming the flower spike just above a node can encourage new branches. With patience, new spikes usually appear within a few months.
What type of potting mix is best for orchids?
Use a well-draining orchid mix made from bark, perlite, and sphagnum moss. Never plant orchids in regular potting soil — it retains too much moisture and restricts airflow around the roots.
How often should I repot my orchid?
Repot your orchid every 1–2 years, ideally after it finishes blooming. This refreshes the bark mix, prevents root rot, and gives your orchid room to grow new roots
